Introduction
Kubernetes is an open-source platform for OCI-compliant container workload orchestration. As a container orchestrator, Kubernetes automates the deployment of containers across multiple systems and helps scale and manage containerized applications.
This guide teaches you how to install Kubernetes on Ubuntu 22.04 by following five steps.
Prerequisites
- Two or more servers running Ubuntu 22.04.
- Command-line access.
- Access to a user account with sudo privileges on each system.
Note: Instructions in this tutorial can also be applied to older Ubuntu versions, such as Ubuntu 20.04 LTS.
Set up Docker
Kubernetes requires a CRI-compliant container engine runtime such as Docker, containerd, or CRI-O. This article shows you how to deploy Kubernetes using Docker.
Install Docker on each server node by executing the steps below:
1. Update the package list:
sudo apt update2. Install Docker with the following command:
sudo apt install docker.io -y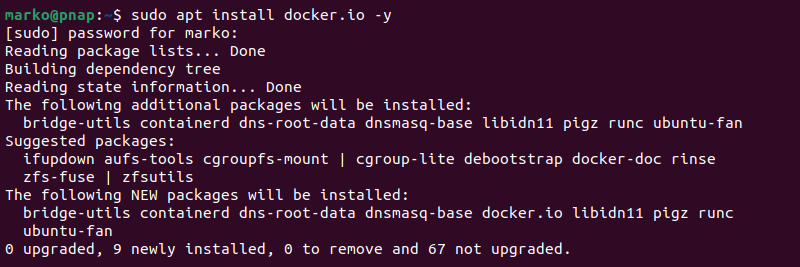
3. Set Docker to launch on boot by entering:
sudo systemctl enable docker4. Verify Docker is running:
sudo systemctl status docker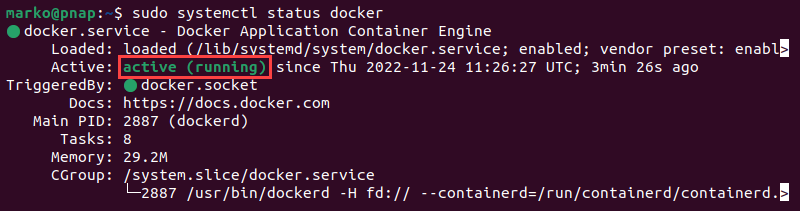
5. If Docker is not running, start it with the following command:
sudo systemctl start dockerInstall Kubernetes
Setting up Kubernetes on an Ubuntu system involves adding the Kubernetes repository to the APT sources list and installing the relevant tools. Follow the steps below to install Kubernetes on all the nodes in your cluster.
Step 1: Add Kubernetes Signing Key
Since Kubernetes comes from a non-standard repository, download the signing key to ensure the software is authentic.
On each node, use the curl command to download the key and store it in a safe place (default is /etc/apt/keyrings/:
curl -fsSL https://packages.cloud.google.com/apt/doc/apt-key.gpg | sudo gpg --dearmor -o /etc/apt/keyrings/kubernetes.gpgStep 2: Add Software Repositories
Kubernetes is not included in the default Ubuntu repositories. To add the Kubernetes repository to your list, enter this command on each node:
echo "deb [arch=amd64 signed-by=/etc/apt/keyrings/kubernetes.gpg] http://apt.kubernetes.io/ kubernetes-xenial main" | sudo tee -a /etc/apt/sources.listEnsure all packages are up to date:
sudo apt updateStep 3: Install Kubernetes Tools
Each Kubernetes deployment consists of three separate tools:
- Kubeadm. A tool that initializes a Kubernetes cluster by fast-tracking the setup using community-sourced best practices.
- Kubelet. The work package that runs on every node and starts containers. The tool gives you command-line access to clusters.
- Kubectl. The command-line interface for interacting with clusters.
Execute the following commands on each server node to install the Kubernetes tools:
1. Run the install command:
sudo apt install kubeadm kubelet kubectl
2. Mark the packages as held back to prevent automatic installation, upgrade, or removal:
sudo apt-mark hold kubeadm kubelet kubectl
Note: The process presented in this tutorial prevents APT from automatically updating Kubernetes. For instructions on how to update, please see the official developers' instructions.
3. Verify the installation with:
kubeadm version
The output of the version command shows basic deployment information.
Note: BMC offers balanced and affordable server instances well suited for containerized services deployment. To simplify and streamline the process, deploy Kubernetes clusters on BMC using our Rancher solution.
Deploy Kubernetes
With the necessary tools installed, proceed to deploy the cluster. Follow the steps below to make the necessary system adjustments, initialize the cluster, and join worker nodes.
Step 1: Prepare for Kubernetes Deployment
This section shows you how to prepare the servers for a Kubernetes deployment. Execute the steps below on each server node:
1. Disable all swap spaces with the swapoff command:
sudo swapoff -aThen use the sed command below to make the necessary adjustments to the /etc/fstab file:
sudo sed -i '/ swap / s/^\(.*\)$/#\1/g' /etc/fstab2. Load the required containerd modules. Start by opening the containerd configuration file in a text editor, such as nano:
sudo nano /etc/modules-load.d/containerd.conf3. Add the following two lines to the file:
overlay
br_netfilter
Save the file and exit.
4. Next, use the modprobe command to add the modules:
sudo modprobe overlaysudo modprobe br_netfilter5. Open the kubernetes.conf file to configure Kubernetes networking:
sudo nano /etc/sysctl.d/kubernetes.conf6. Add the following lines to the file:
net.bridge.bridge-nf-call-ip6tables = 1
net.bridge.bridge-nf-call-iptables = 1
net.ipv4.ip_forward = 1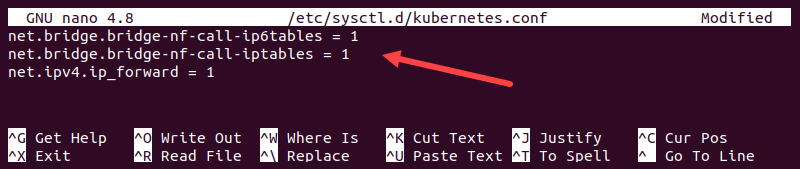
Save the file and exit.
7. Reload the configuration by typing:
sudo sysctl --system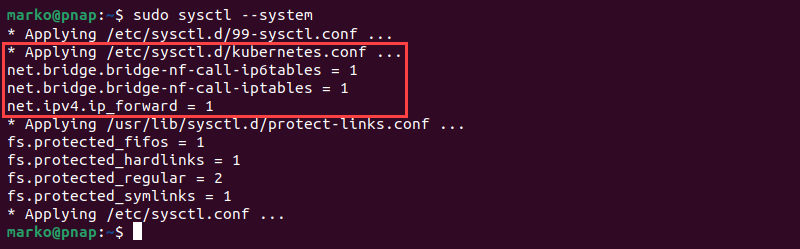
Step 2: Assign Unique Hostname for Each Server Node
1. Decide which server will be the master node. Then, enter the command on that node to name it accordingly:
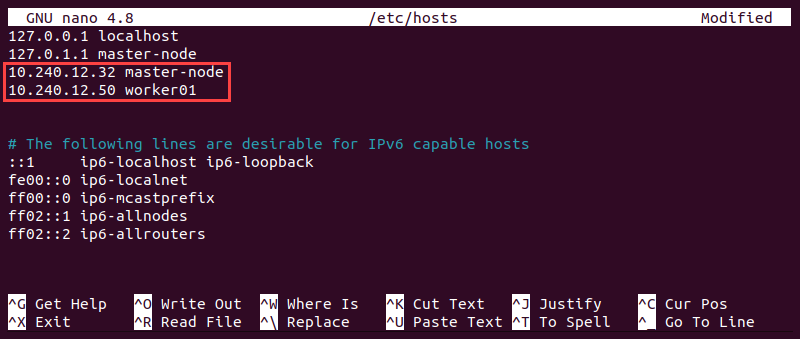
sudo hostnamectl set-hostname master-node2. Next, set the hostname on the first worker node by entering the following command:
sudo hostnamectl set-hostname worker01If you have additional worker nodes, use this process to set a unique hostname on each.
3. Edit the hosts file on each node by adding the IP addresses and hostnames of the servers that will be part of the cluster.
4. Restart the terminal application to apply the hostname change.
Step 3: Initialize Kubernetes on Master Node
Once you finish setting up hostnames on cluster nodes, switch to the master node and follow the steps to initialize Kubernetes on it:
1. Open the kubelet file in a text editor.
sudo nano /etc/default/kubelet2. Add the following line to the file:
KUBELET_EXTRA_ARGS="--cgroup-driver=cgroupfs"Save and exit.
3. Reload the configuration and restart the kubelet:
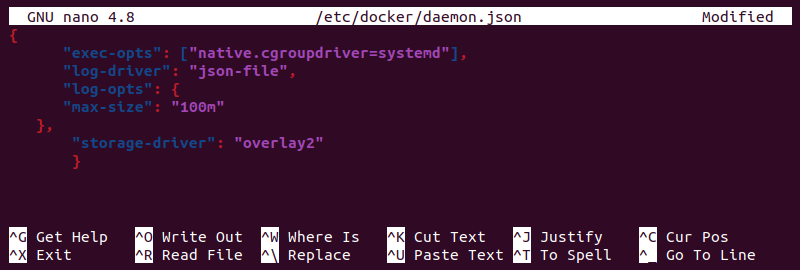
sudo systemctl daemon-reload && sudo systemctl restart kubelet4. Open the Docker daemon configuration file:
sudo nano /etc/docker/daemon.json5. Append the following configuration block:
    {
      "exec-opts": ["native.cgroupdriver=systemd"],
      "log-driver": "json-file",
      "log-opts": {
      "max-size": "100m"
   },

       "storage-driver": "overlay2"
       }
Save the file and exit.
6. Reload the configuration and restart Docker:
sudo systemctl daemon-reload && sudo systemctl restart docker7. Open the kubeadm configuration file:
sudo nano /etc/systemd/system/kubelet.service.d/10-kubeadm.conf8. Add the following line to the file:
Environment="KUBELET_EXTRA_ARGS=--fail-swap-on=false"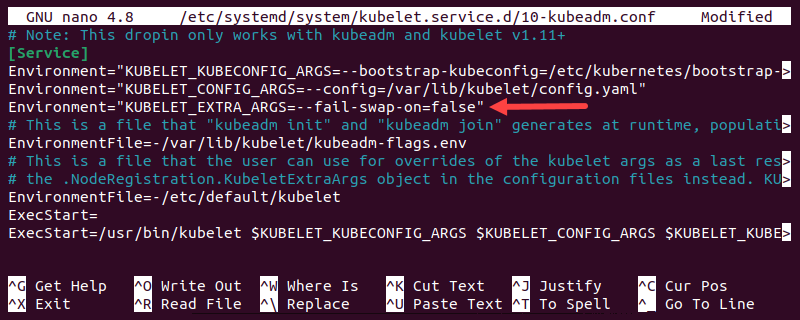
Save the file and exit.
9. Reload the configuration and restart the kubelet:
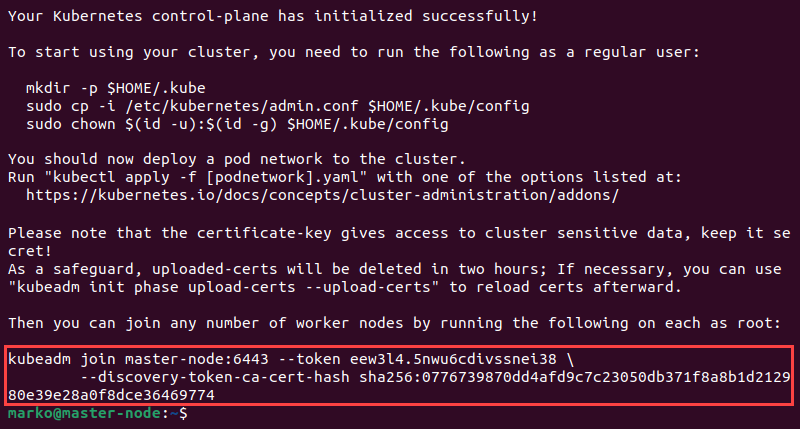
sudo systemctl daemon-reload && sudo systemctl restart kubelet10. Finally, initialize the cluster by typing:
sudo kubeadm init --control-plane-endpoint=master-node --upload-certsOnce the operation finishes, the output displays a kubeadm join command at the bottom. Make a note of this command, as you will use it to join the worker nodes to the cluster.
11. Create a directory for the Kubernetes cluster:
mkdir -p $HOME/.kube12. Copy the configuration file to the directory:
sudo cp -i /etc/kubernetes/admin.conf $HOME/.kube/config13. Change the ownership of the directory to the current user and group using the chown command:
sudo chown $(id -u):$(id -g) $HOME/.kube/configStep 4: Deploy Pod Network to Cluster
A pod network is a way to allow communication between different nodes in the cluster. This tutorial uses the Flannel node network manager to create a pod network.
Apply the Flannel manager to the master node by executing the steps below:
1. Use kubectl to install Flannel:
kubectl apply -f https://github.com/flannel-io/flannel/releases/latest/download/kube-flannel.yml2. Untaint the node:
kubectl taint nodes --all node-role.kubernetes.io/control-plane-Step 5: Join Worker Node to Cluster
Repeat the following steps on each worker node to create a cluster:
1. Stop and disable AppArmor:
sudo systemctl stop apparmor && sudo systemctl disable apparmor2. Restart containerd:
sudo systemctl restart containerd.service3. Apply the kubeadm join command from Step 3 on worker nodes to connect them to the master node. Prefix the command with sudo:
sudo kubeadm join [master-node-ip]:6443 --token [token] --discovery-token-ca-cert-hash sha256:[hash]
Replace [master-node-ip], [token], and [hash] with the values from the kubeadm join command output.
4. After a few minutes, switch to the master server and enter the following command to check the status of the nodes:
kubectl get nodes
The system displays the master node and the worker nodes in the cluster.
Conclusion
After following the steps presented in this article, you should have Kubernetes installed on Ubuntu. The article included instructions on installing the necessary packages and deploying Kubernetes on all your nodes.
If you are a beginner with no experience in Kubernetes deployment, Minikube is a great place to start.
