Introduction
MySQL is one of the most popular and widely used open-source relational database management systems.
It's a fast, simple, and scalable SQL-based system, and it represents an integral component of the LAMP stack that runs much of the Internet.
In this tutorial, you will learn how to install MySQL on Ubuntu 20.04.
Prerequisites:
- A system running Ubuntu 20.04
- A user account with sudo privileges
- Access to a terminal (Ctrl + Alt + T)
- Network connection
Install MySQL on Ubuntu 20.04
Hosting MySQL databases on Ubuntu 20.04 requires installing the MySQL Server package. You can also access the database from remote clients using the MySQL Client.
Follow these simple steps to install MySQL Server on Ubuntu 20.04.
Note: If you haven't upgraded your system from 18.04 yet, take a look at our tutorial for installing MySQL on Ubuntu 18.04. For those using 22.04 version, see Install MySQL on Ubuntu 22.04.
Step 1: Update/Upgrade Package Repository
Update the system package repository to ensure you are installing the latest MySQL release.
1. Open the terminal and run the following command:
sudo apt update2. Enter your password and wait for the update to finish.
3. Next, run:
sudo apt upgrade4. Enter Y when prompted to continue with the upgrade and hit ENTER. Wait for the upgrade to finish.
Step 2: Install MySQL
1. After successfully updating the package repository, install MySQL Server by running the following command:
sudo apt install mysql-server2. When asked if you want to continue with the installation, answer Y and hit ENTER.
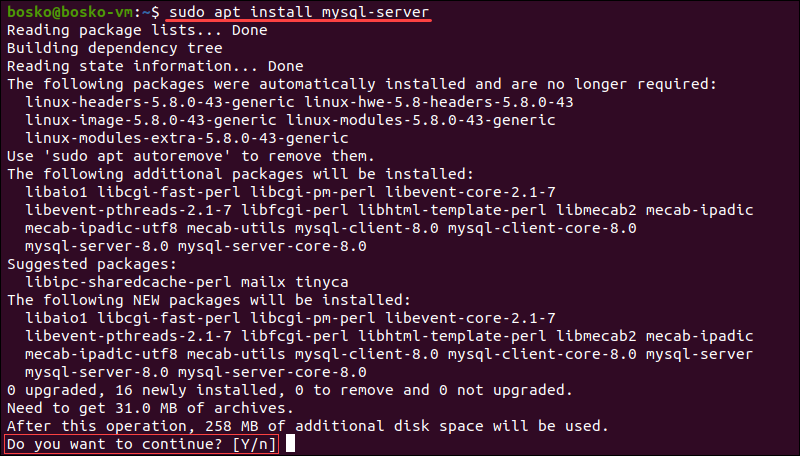
The system downloads MySQL packages and installs them on your machine.
Note: If you only want to connect to a remote MySQL server instead of hosting a database on your machine, install only the MySQL Client by running:
sudo apt install mysql-client3. Check if MySQL was successfully installed by running:
mysql --version
The output shows which version of MySQL is installed on the machine.
Note: If you are using Windows, learn how to install and configure MySQL on a Windows Server.
Step 3: Securing MySQL
The MySQL instance on your machine is insecure immediately after installation.
1. Secure your MySQL user account with password authentication by running the included security script:
sudo mysql_secure_installation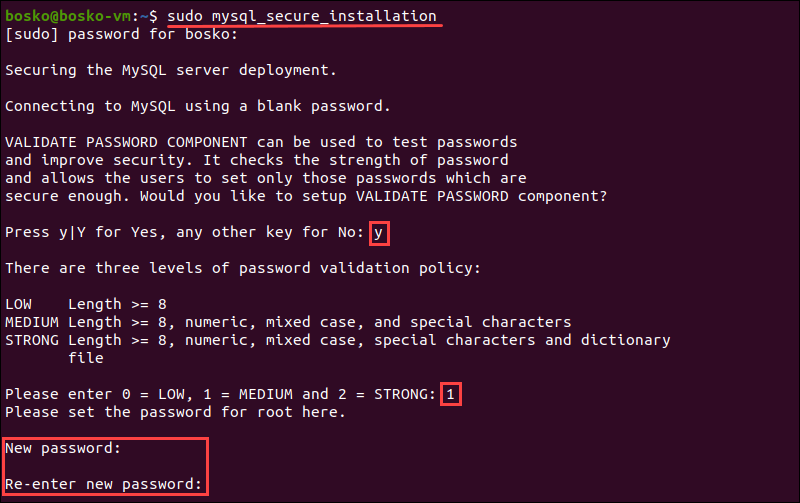
2. Enter your password and answer Y when asked if you want to continue setting up the VALIDATE PASSWORD component. The component checks to see if the new password is strong enough.
3. Choose one of the three levels of password validation:
0- Low. A password containing at least 8 characters.1- Medium. A password containing at least 8 characters, including numeric, mixed case characters, and special characters.2- Strong. A password containing at least 8 characters, including numeric, mixed case characters, and special characters, and compares the password to a dictionary file.
Enter 0, 1, or 2 depending on the password strength you want to set. The script then instructs you to enter your password and re-enter it afterward to confirm.
Any subsequent MySQL user passwords need to match your selected password strength.
Note: Even though you are setting a password for the root user, this user does not require password authentication when logging in.
The program estimates the strength of your password and requires confirmation to continue.
4. Press Y if you are happy with the password or any other key if you want a different one.

5. The script then prompts for the following security features:
- Remove anonymous users?
- Disallow root login remotely?
- Remove test database and access to it?
- Reload privilege tables now?
The recommended answer to all these questions is Y. However, if you want a different setting for any reason, enter any other key.
For example, if you need the remote login option for your server, enter any key other than Y for that prompt.
Note: Check out our tutorial if you want to create a new MySQL user and grant privileges.
Step 4: Check if MySQL Service Is Running
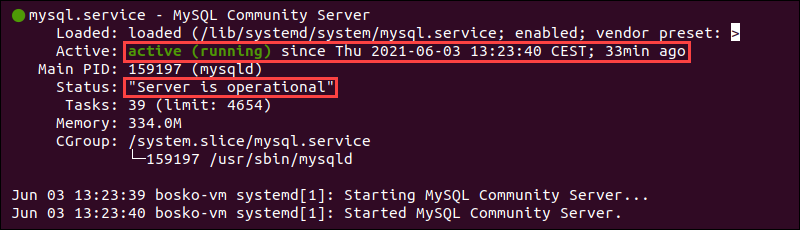
Upon successfully installing MySQL, the MySQL service starts automatically.
Verify that the MySQL server is running by running:
sudo systemctl status mysqlThe output should show that the service is operational and running:
Step 5: Log in to MySQL Server
Finally, to log in to the MySQL interface, run the following command:
sudo mysql -u root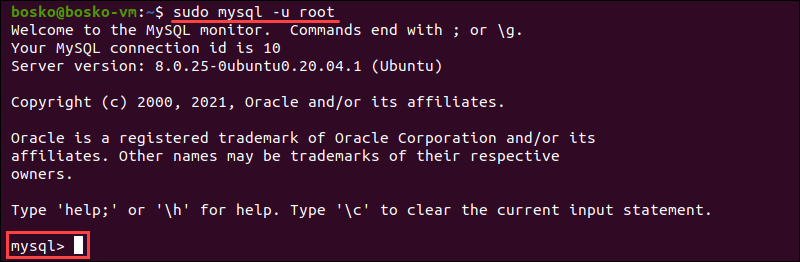
Now you can execute queries, create databases, and test out your new MySQL setup. Take a look at our MySQL Commands Cheat Sheet for some important MySQL commands to know.
Note: You my find helpful our article on how to resolve an error 'Can't connect to local MySQL server through socket '/var/run/mysqld/mysqld.sock (2)' that can appear when logging into the MySQL interface.
Conclusion
You should now have a fully functioning MySQL server installed on your machine. Start exploring the vast possibilities of MySQL and test the various functions it has to offer.
Become an advanced MySQL user by reading our tutorials for MySQL Events, MySQL JOINS, MySQL Stored Procedures, and MySQL Triggers.
