Introduction
OpenVPN Access Server is a tool that provides secure access to private networks. With the support for all popular OSes and multiple authentication methods, it is a go-to VPN solution for many SMBs.
If you do not use more than two simultaneous connections, the Access Server is free of charge.
Follow this guide to learn how to set up OpenVPN Access Server and configure network settings.
Prerequisites
Take note of the following information:
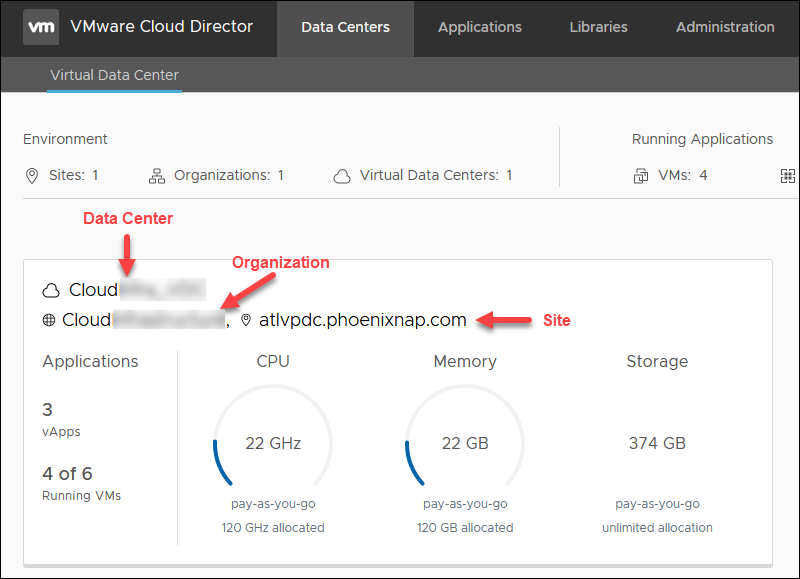
- Data center name - e.g., CloudTest_DC
- Organization name - e.g., CloudOrgTest
- Site location - e.g., atlvpdc.phoenixnap.com
The details are available on the VMware Cloud Director landing page.
Organization Overview
On the Cloud Director landing page, select a data center. Below is the overview of the information you need for OpenVPN Access Server setup.
Note: All IPs in this guide are used as an example. Please use your own public IPs within the external network's range. You can choose any private IP for the configuration.
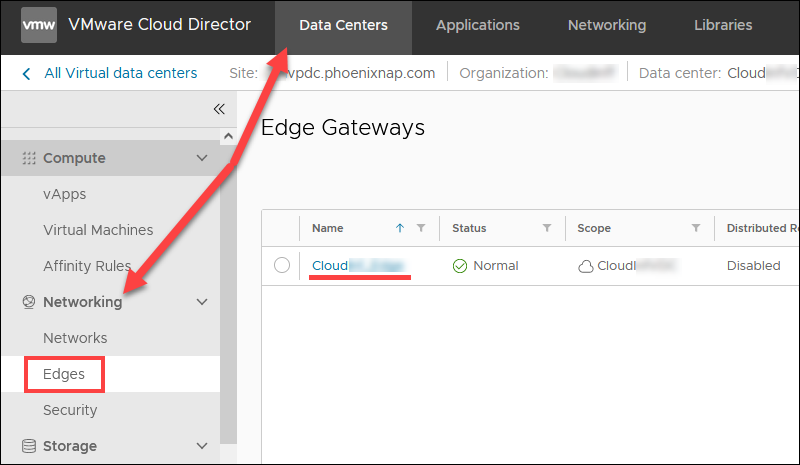
- External network name. In the Data Centers tab, select Networking -> Edges and click the Edge name.
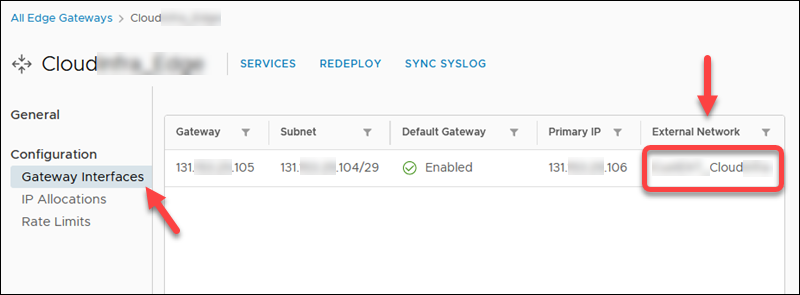
Choose Gateway Interfaces to view the external network name. The name includes your organization's name.
- First available public IP address. In the Data Centers tab, select Networking -> Edges. Click the Edge name and then IP Allocations to view the assigned public IP range.
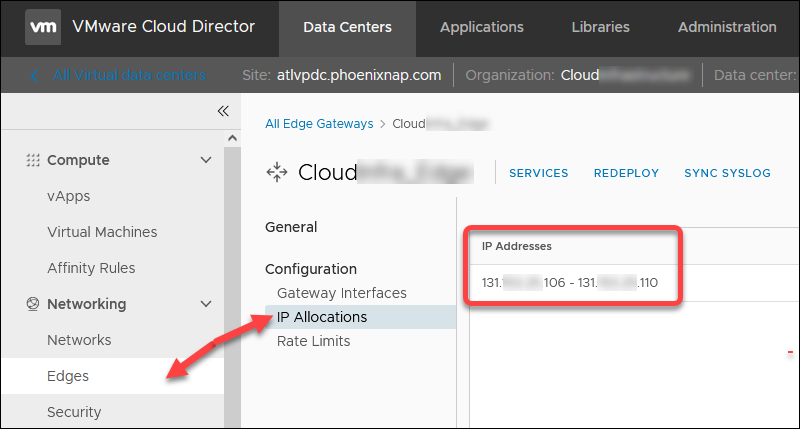
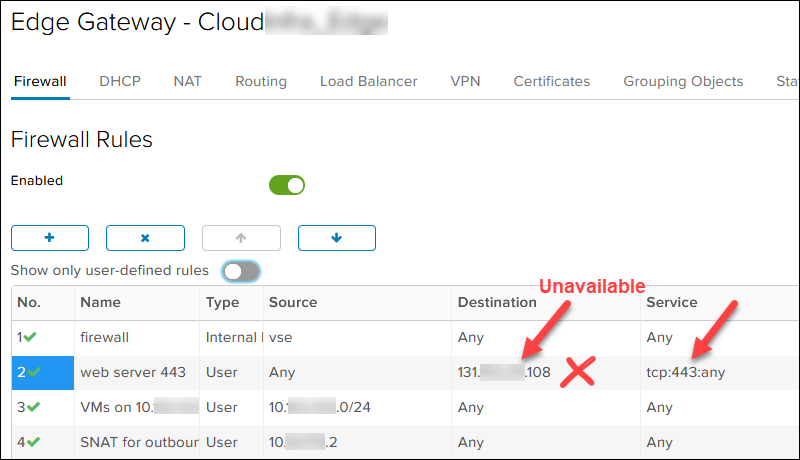
Then, click SERVICES and refer to the NAT and Firewall rules to determine which public IP from the range on TCP 443 port is unavailable. In our case, 131.xxx.xxx.108 is taken, so the first available public IP is 131.xxx.xxx.106.
- Document new DMZ network subnet for the new OpenVPN server. Choose any private IP. We picked /29 in case a second OpenVPN node is needed. For example:
- DMZ network: 10.xxx.xxx.1/29
- DMZ gateway: 10.xxx.xxx.1
- One OpenVPN Access Server IP: 10.xxx.xxx.2
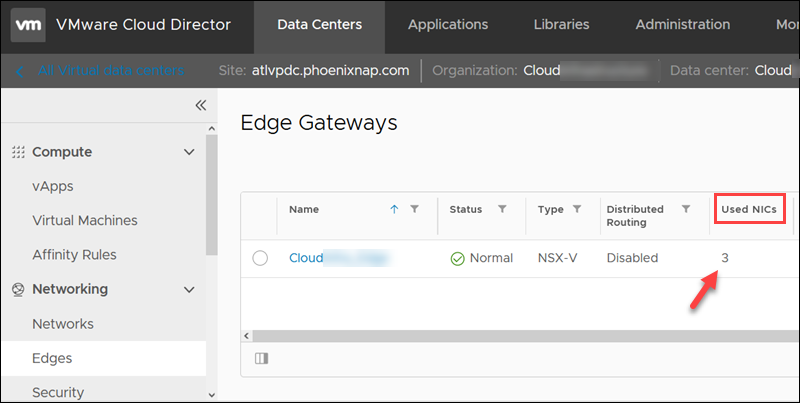
- The number of used NICs for the edge. If you have 10 NICs, the new DMZ network will be created as Isolated even if Routed is selected. The Used NICs number is in the list of your edges
- VM guest network, for example, 10.xxx.xxx.0/24.
Create OpenVPN Access Server Account
To create a free OpenVPN Access Server account:
1. Go to the OpenVPN Access Server page.
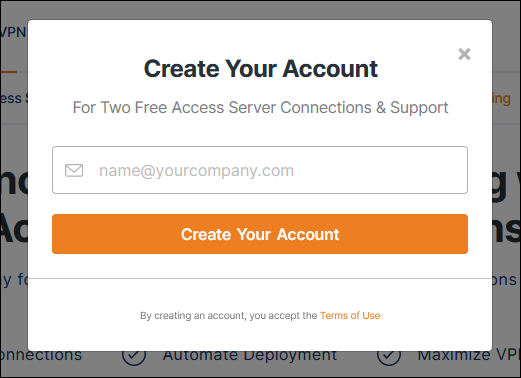
2. Click the Get Your Free Connections button.

3. Enter the Email and click Create Your Account.
4. Click the Confirm your email link when you receive the Email from OpenVPN.
5. Enter a password when the page loads.
6. Select Business Use (requires more information) or Personal Use and click Continue.
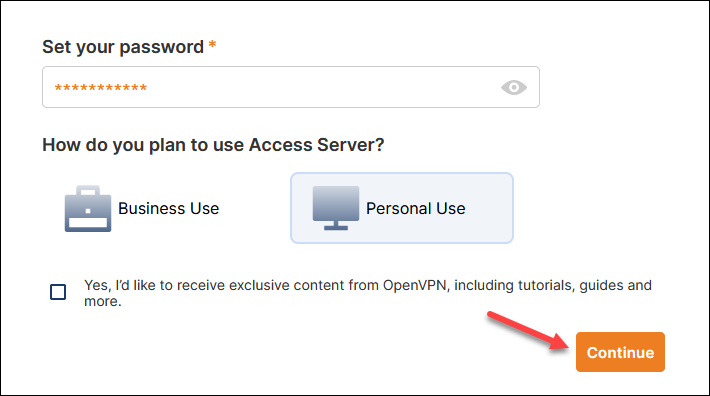
The Access Server Portal loads.
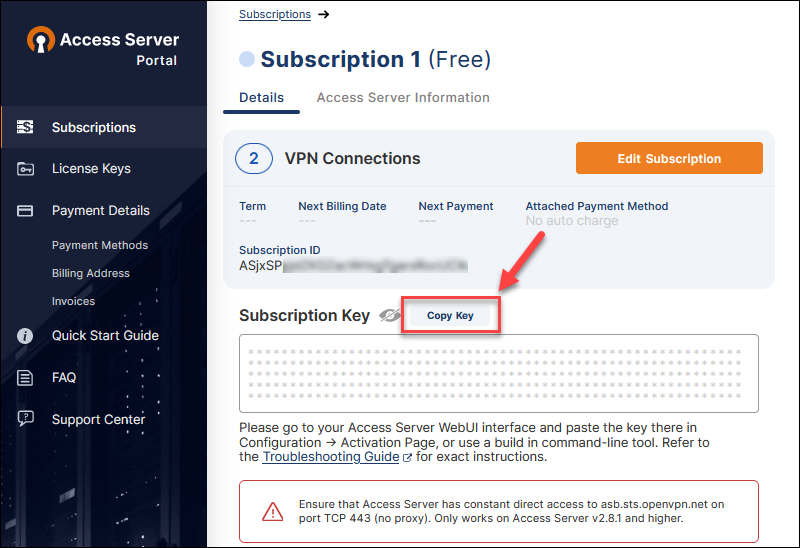
7. Click Create to create an activation key.

The subscription and key details page loads.
8. Click the Copy Key button and save the subscription key as you will need it later for the OpenVPN Access Server configuration.
Create DMZ Network for New OpenVPN Access Server
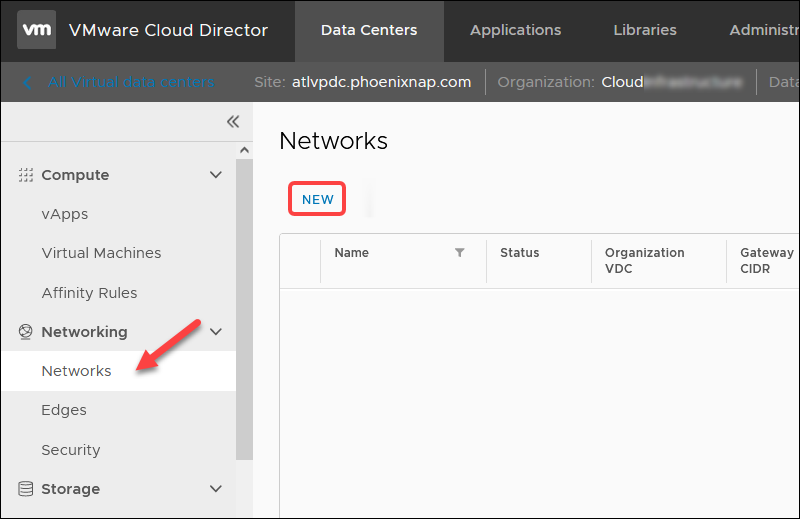
To create a new DMZ for the new OpenVPN Access Server network in VMware Cloud Director for your organization, navigate to Data Centers -> Networking - > Networks.
Click NEW to start the wizard.
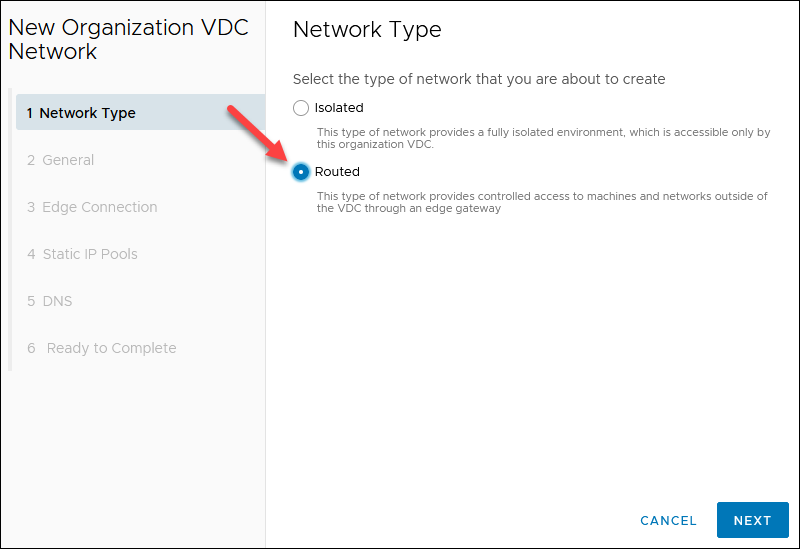
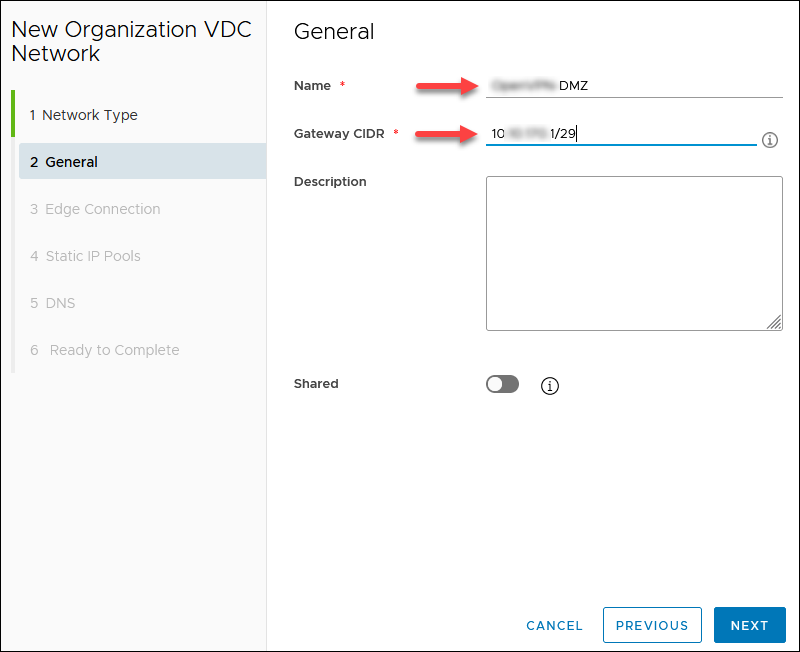
1. Select Routed for the network type step and click NEXT.
2. Enter a network Name and the Gateway CIDR you chose earlier, for example, 10.xxx.xxx.1/29. Other fields are optional. Click NEXT.
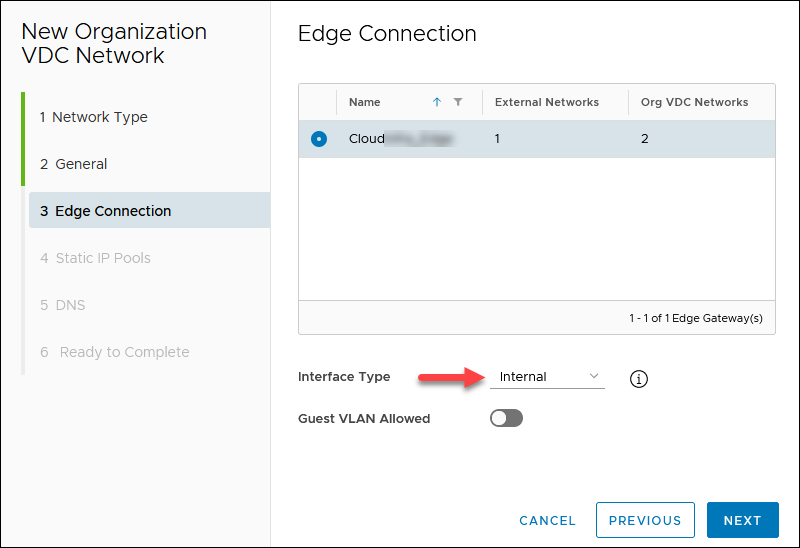
3. Chose Interface Type Internal for the selected edge with the Public IP and click NEXT. An example gateway is 10.xxx.xxx.1.
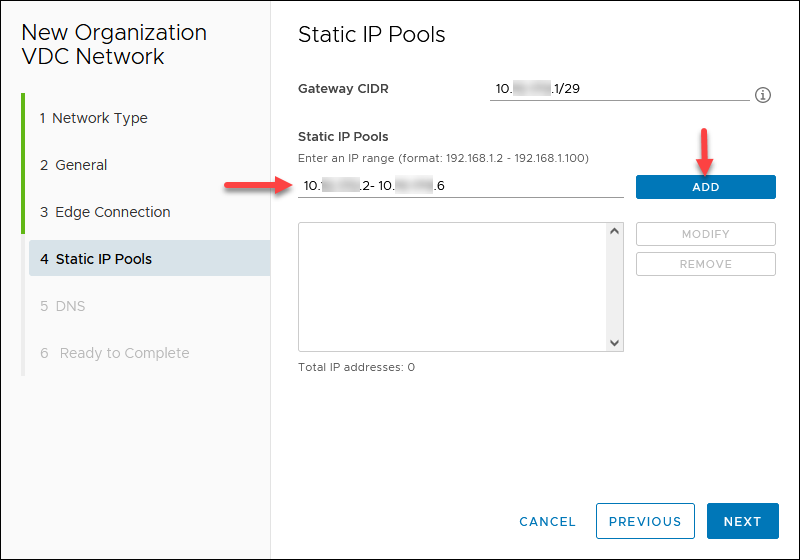
4. Add static IP pools defined by the gateway CIDR you designated earlier. For example, 10.xxx.xxx.2 - 10.xxx.xxx.6. Click NEXT.
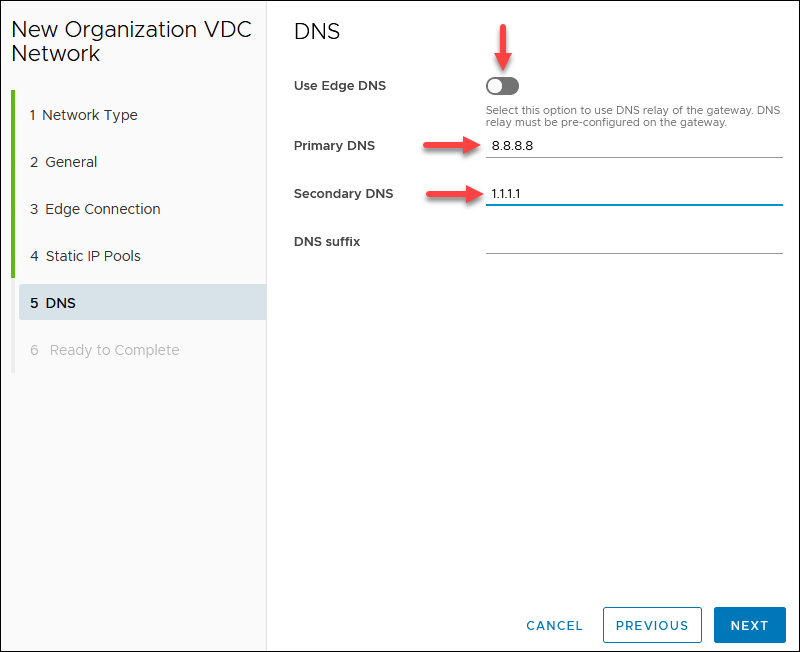
5. If your edge has a DNS, you can enable Use Edge DNS. Otherwise, specify a public DNS provider, for example, 8.8.8.8 (primary DNS) and 1.1.1.1 (secondary DNS). Click NEXT.
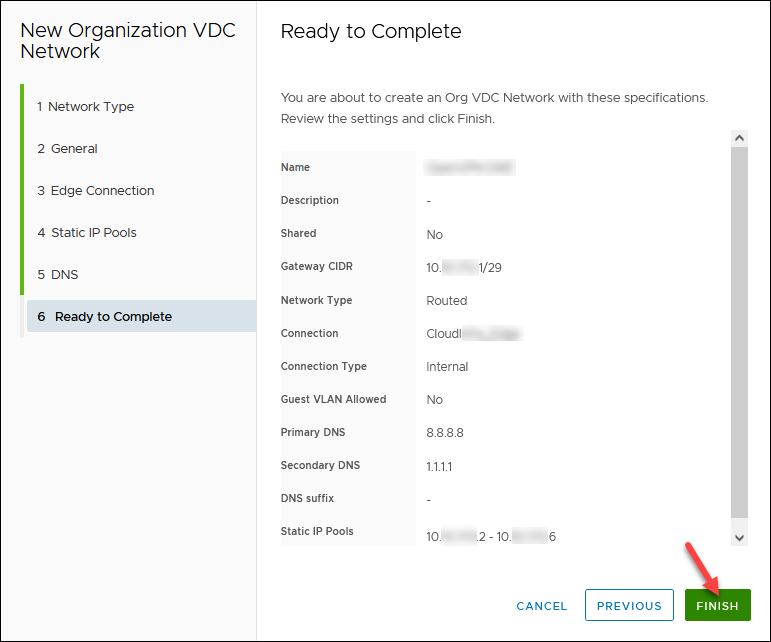
6. Review the network configuration and click FINISH when ready.
Create SNAT/DNAT Edge Rules
To create new rules, in the Data Centers tab:
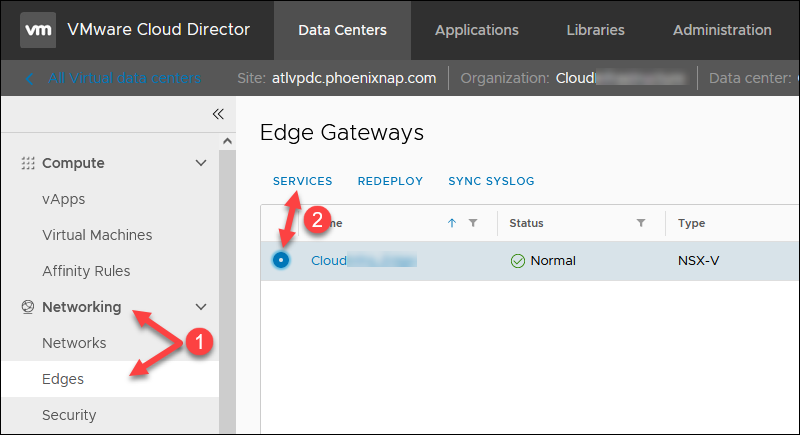
1. Navigate to Networking -> Edges.
2. Select an Edge Gateway and click Services. Wait for the pop-up window to load to apply all new rules on the external network name recorded.
3. Click the NAT tab to start adding new rules. You can save the changes after every rule or when you add all of them.
Create SNAT Rule
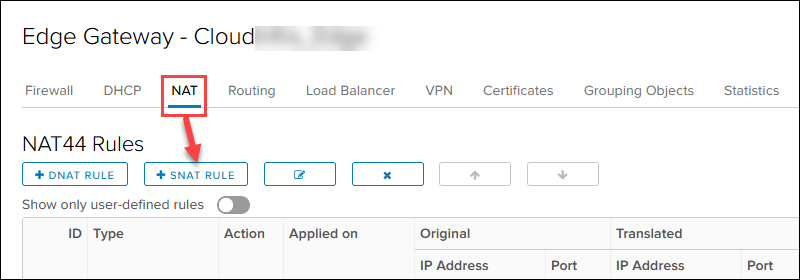
To create a SNAT rule for outbound internet access in the NAT section:
1. Click the + SNAT RULE button.
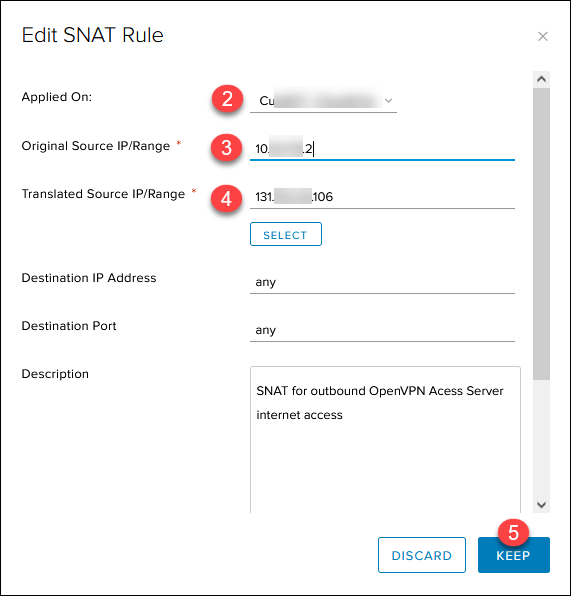
2. Select the external public network.
3. Add the OpenVPN Access Server IP 10.xxx.xxx.2 in the Original Source IP/Range for any port and protocol.
4. Add the previously noted first available public IP 131.xxx.xxx.106 in the Translated Source IP/Range for any port and protocol.
5. Add a relevant description and click KEEP.
The Save changes message appears on the main page. Save the progress now or when you add all rules.
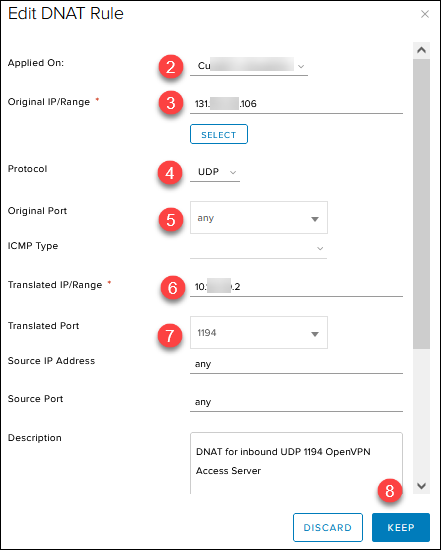
Create DNAT Rules
Create the DNAT inbound rules in the NAT section:
1. Click the + DNAT RULE button.
2. Select the external public network.
3. Add the public IP 131.xxx.xxx.106 in the Original Source IP/Range.
4. Select UDP in the Protocol drop-down list.
5. Choose Any in the Original Port drop-down list.
6. Add the OpenVPN Access Server IP 10.xxx.xxx.2 in the Translated Source IP/Range field for any source port and IP.
7. Enter 1194 in the Translated Port.
8. Add a relevant description and click KEEP.
Repeat the same steps for the second and third DNAT inbound rule, with these changes:
- Set Protocol to TCP, Translated Port to 443, and add a relevant description.
- Set Protocol to TCP, Translated Port to 943, and add a relevant description. (This one is a temporary rule for initial administration).
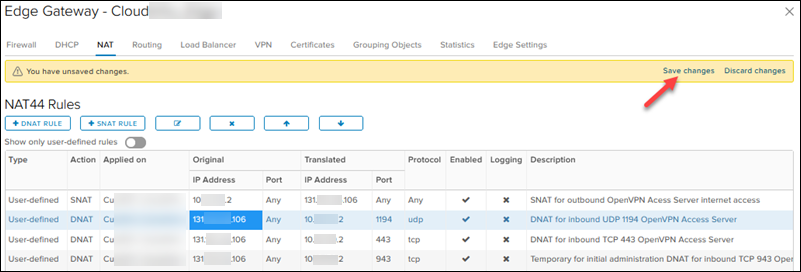
Remember to click Save changes when you finish adding all the rules or after every rule.
The rule list should look like this:
Create Firewall Edge Rules
The firewall rules in this section must be higher than deny rules.
To create a firewall rule in the Data Centers tab:
1. Navigate to Networking -> Edges.
2. Select an Edge Gateway and click Services. Wait for the pop-up window to load.
3. Click the Firewall tab and the + button to start adding new rules. You need six different rules listed in step 6 below. Save the changes after every rule or when you add all of them.
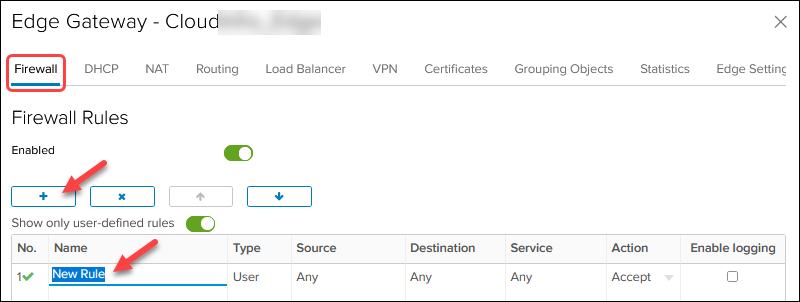
Edit the values in the columns for every firewall rule. Hover over a cell to see the available actions. For the names of firewall rules, use the description from the NAT rules.
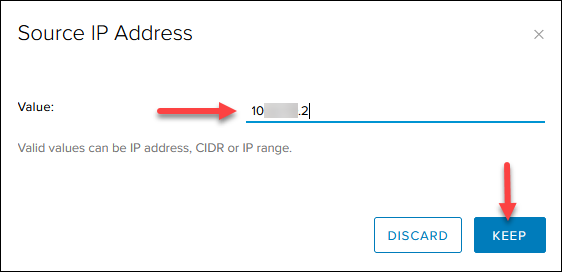
4. For Source and Destination, click the IP button to add an IP.
5. For Service, click the + button and add the protocol and the destination port as listed in the image in step 6. Leave the source port to any.
Note: The order of the source and destination port in the Add Service box does not correlate to how the firewall rule table displays them.
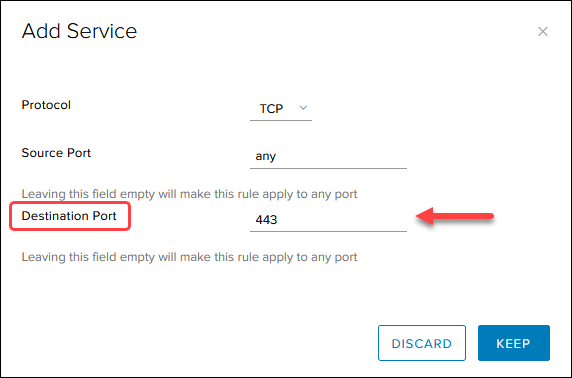
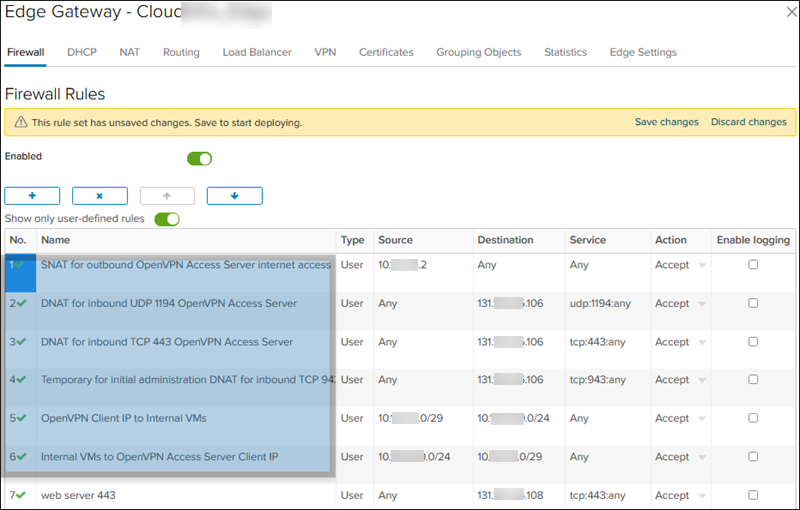
6. When you finish, the firewall rules table looks like this:
Create vApp with VM
To create a vApp with a new VM in the Data Centers tab:
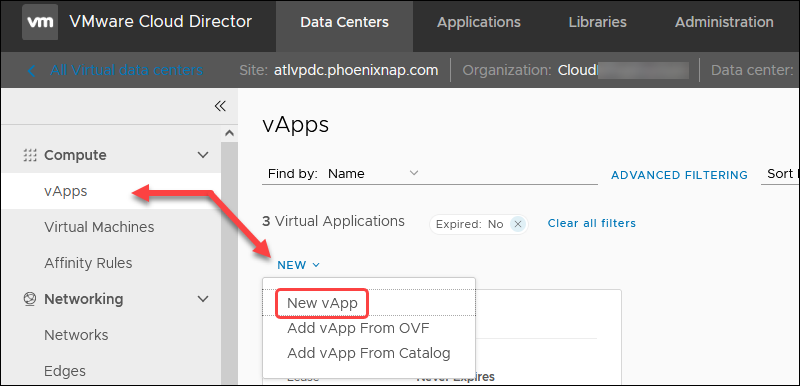
1. Navigate to Compute -> vApps -> NEW and select New vApp.
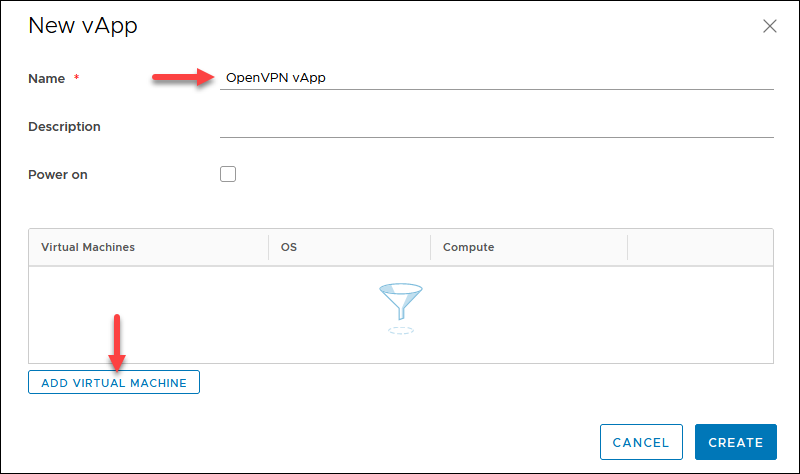
2. Enter a name for the vApp and click the ADD VIRTUAL MACHINE button
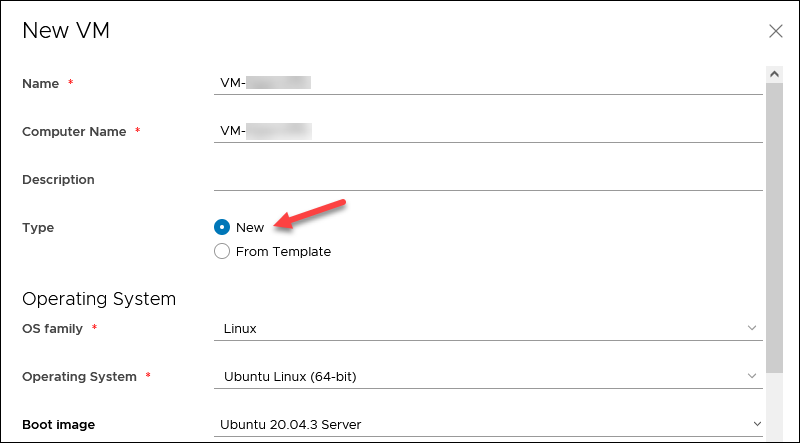
3. Enter a VM name without spaces.
4. Select Type -> New and specify the OS details:
- OS family: Linux
- Operating System: Ubuntu Linux (64-bit)
- Boot image: Ubuntu 20.04.3 Server.
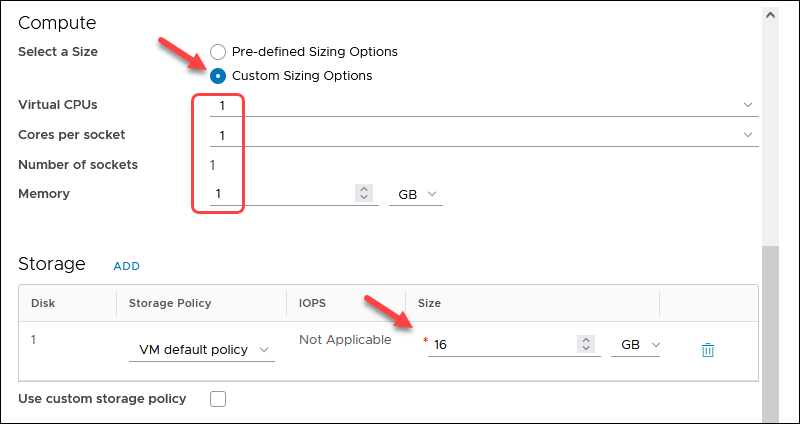
5. In the Compute section, select Custom Sizing Options and set all four values to 1.
6. Enter 16GB for the disk size in the Storage section.
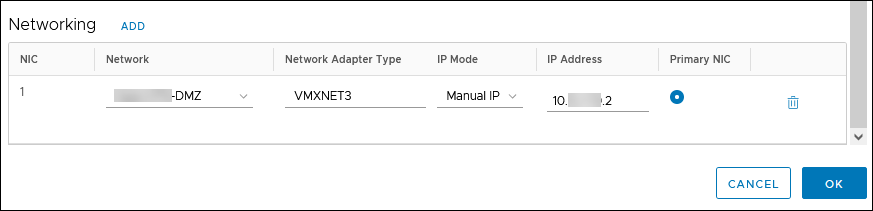
5. In the Network section, choose:
- The previously created routed network.
- Network Adapter Type: VMXNET3
- IP Mode: Manual IP
- IP Address: OpenVPN Access Server IP 10.xxx.xxx.2
6. Click OK and then CREATE. The progress is shown on the vApps screen.
Configure VM
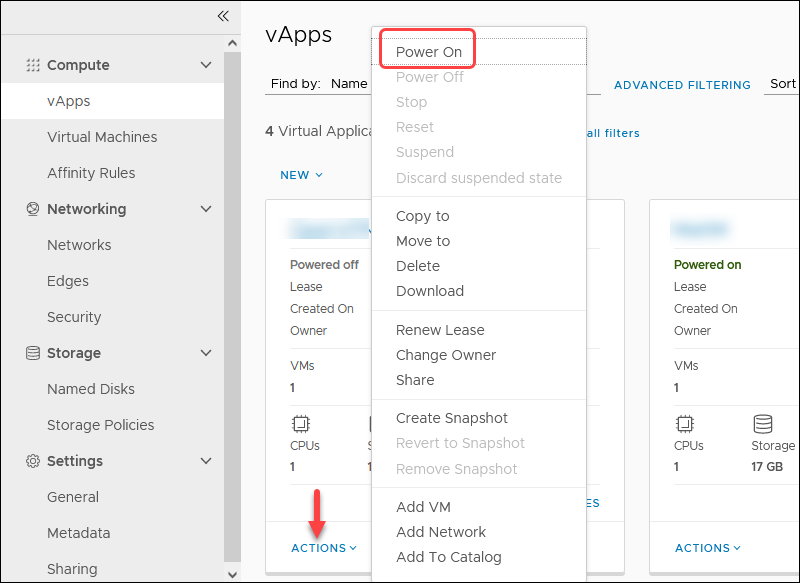
To complete the VM setup, power on the vApp to start the OpenVPN Access Server VM:
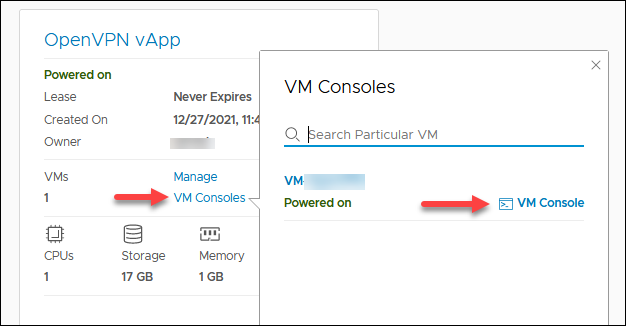
1. In the vApps screen, click the ACTIONS link and choose Power On.
2. Click VM Consoles and then VM Console to get access to the VM.
Wait for the VM to boot up.
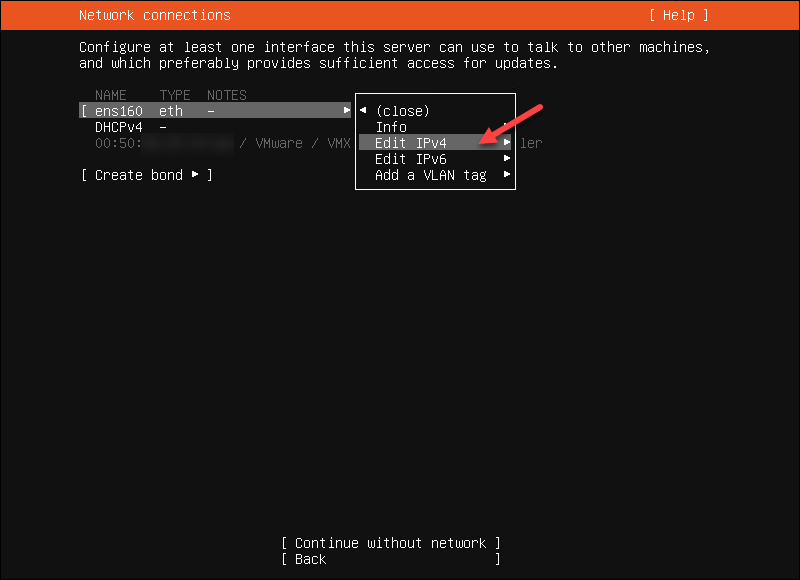
3. Highlight ens160 and choose Edit IPv4.
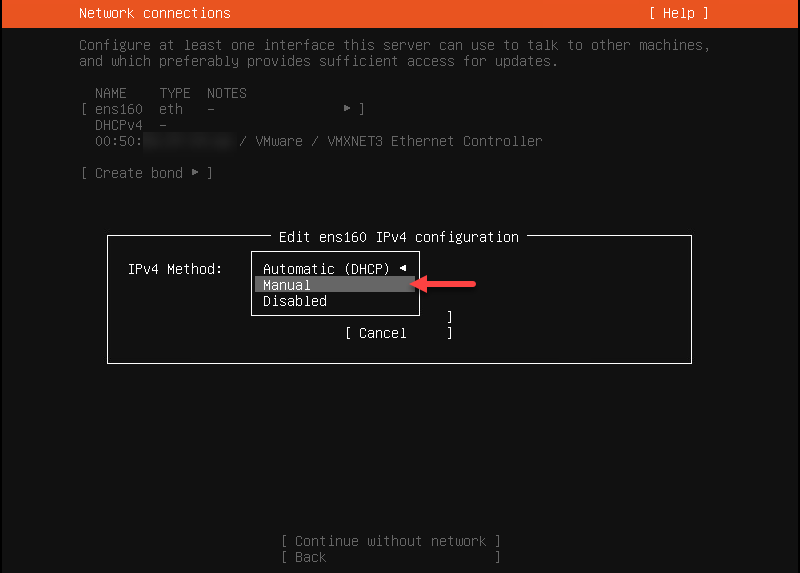
4. Choose Manual for the IPv4 Method. Confirm by selecting Done.
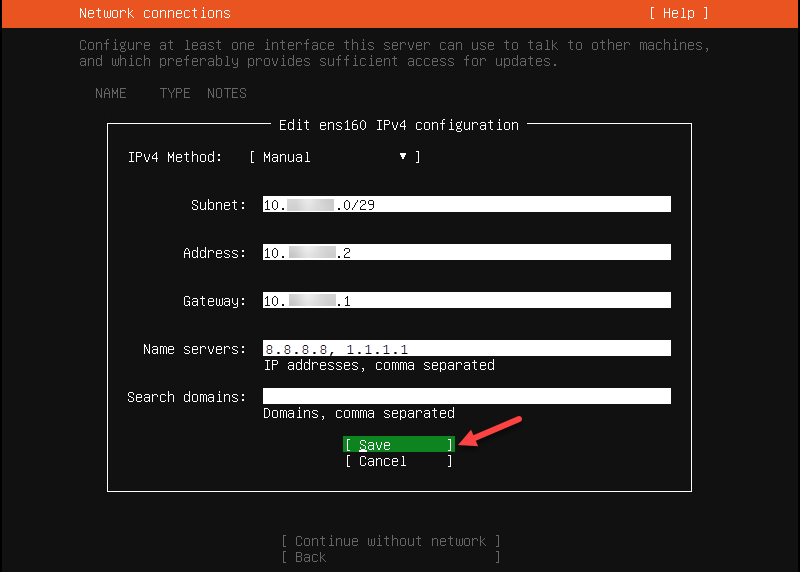
5. Enter the network settings you used previously and select Save.
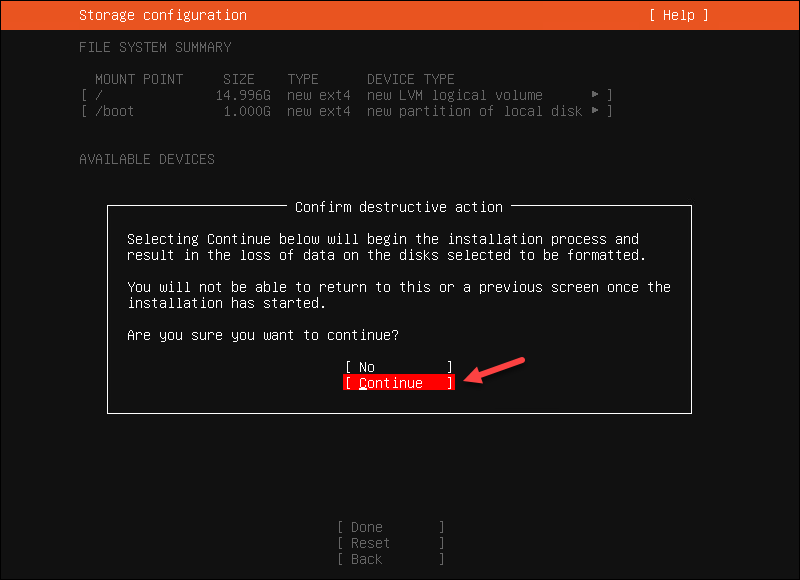
6. Select Done for the rest of the options and Continue to the storage configuration screen.
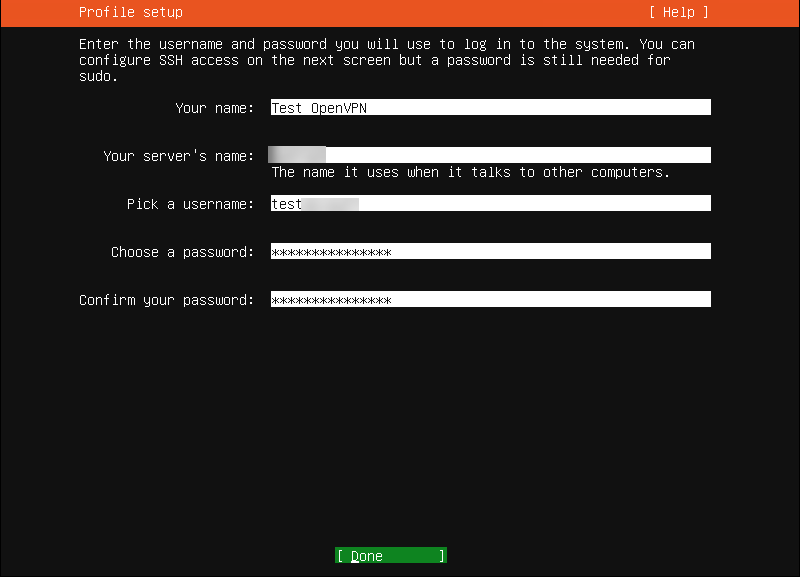
7. Complete the profile setup and save the account information securely. The username is stored in the sudoers file. Do not use "openvpn" as a username so that the OS and the OpenVPN Access Server application account can be separate.
Note: The server's name will be reflected in the Web OpenVPN Access Server Subscription Portal.
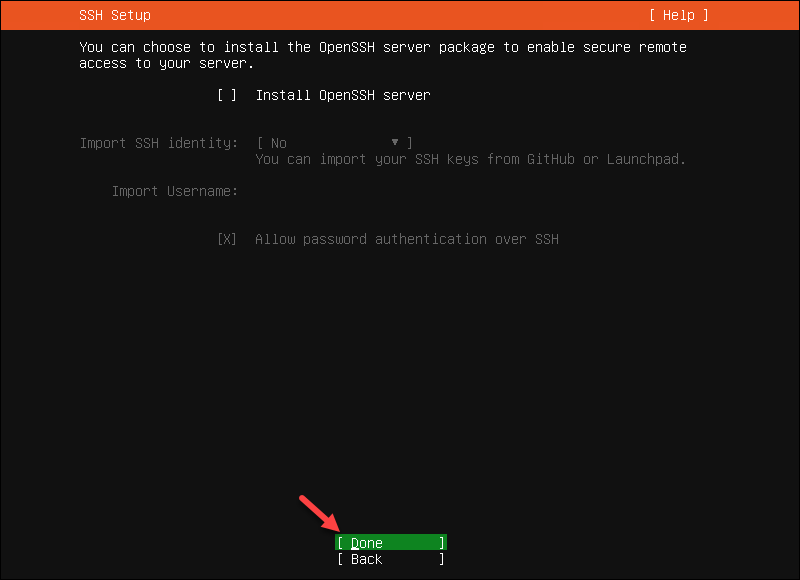
8. Skip the SSH Server installation. Select Done to continue.
9. Wait for the process to finish and select Reboot Now.
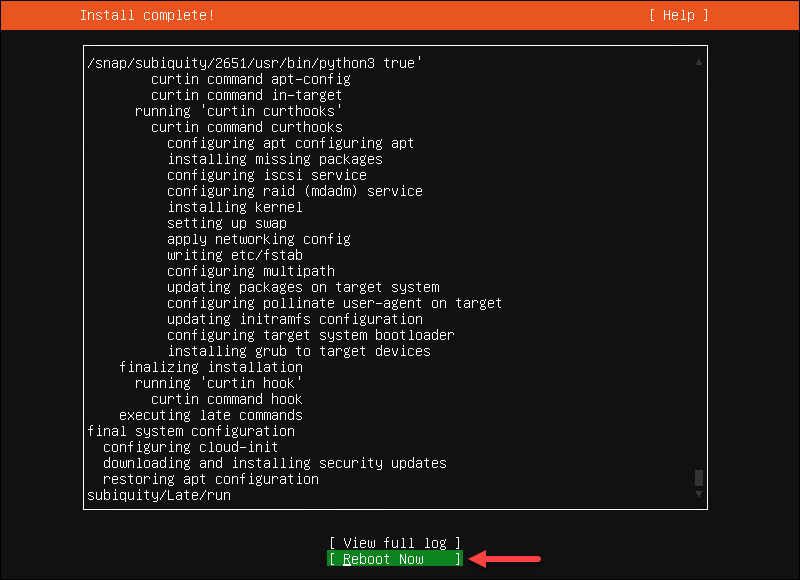
When done, the console shows the Failed unmounting /cdrom message.
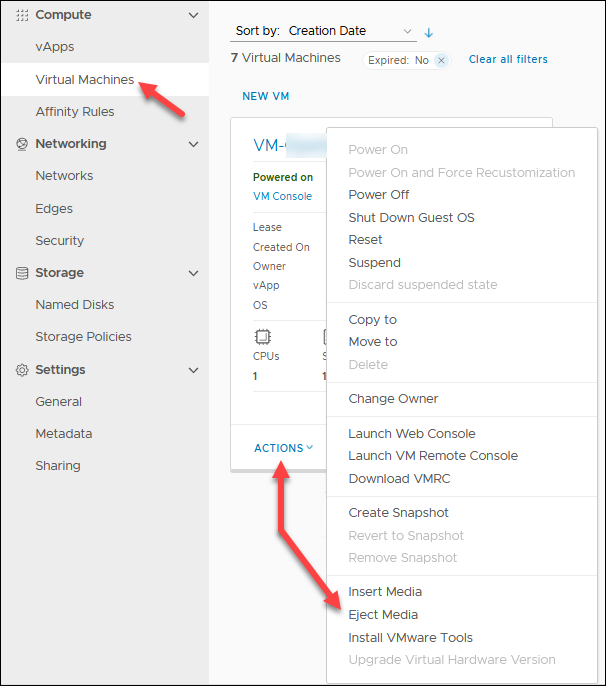
10. In the Cloud Director, locate the OpenVPN Access Server VM in the Compute -> Virtual Machines screen. Click ACTIONS and select Eject Media to remove the Ubuntu ISO from the VM.
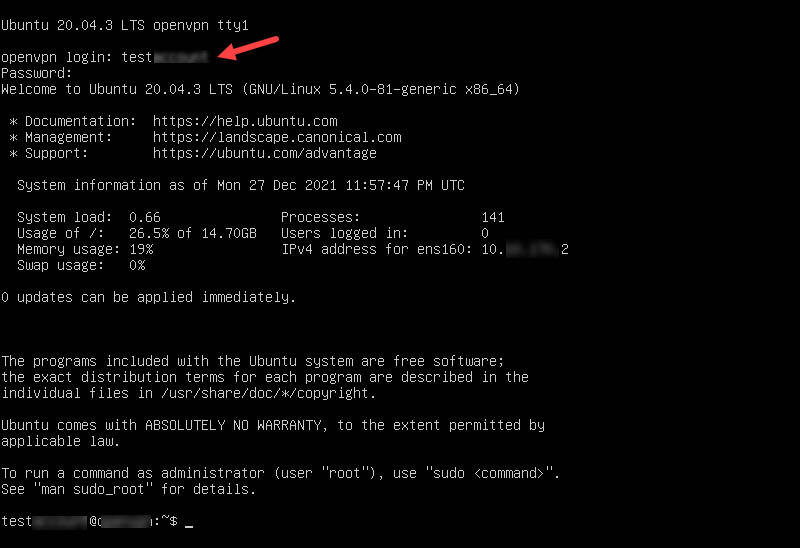
11. Return to the VM console and hit Enter to reboot the machine. The VM boots to the login screen.
12. Enter the username and password used during the profile creation.
Verify VM Network and Install Updates
Ping the edge gateway and a DNS server via the VM console to verify the connection.
ping 10.xxx.xxx.1
ping 1.1.1.1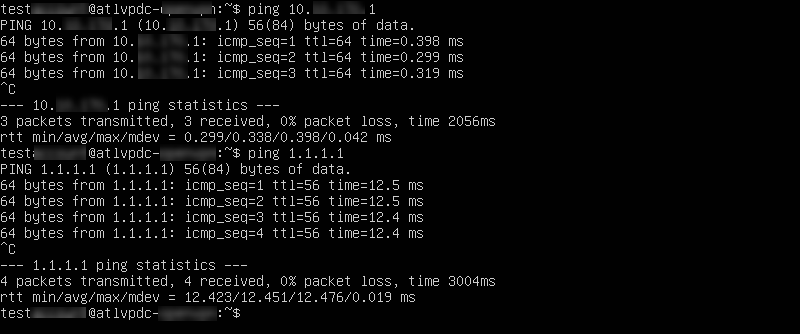
When you confirm the connection is working, update the system:
sudo su -
apt update -y && apt upgrade -y
To make changes in the network configuration, edit the netplan config file using a text editor:
nano /etc/netplan/00-installer-config.yaml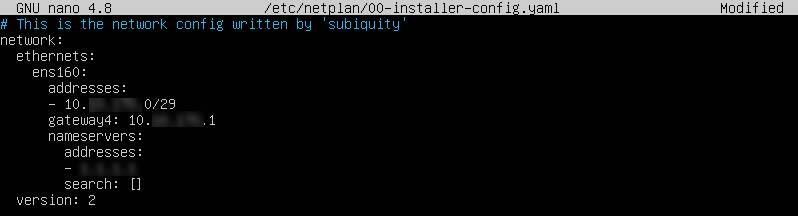
Install OpenVPN Access Server
To install the OpenVPN Access Server:
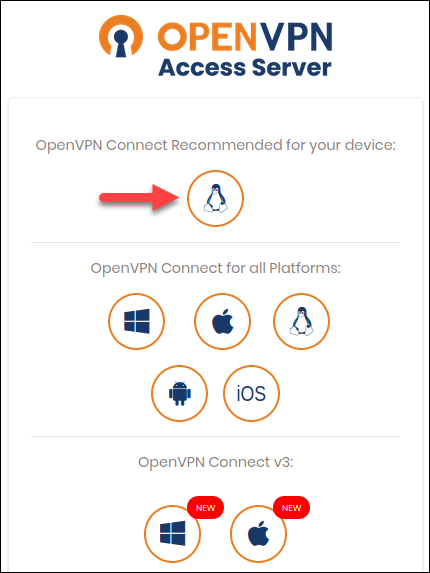
1. Go to the OpenVPN Access Server packages page and click the Ubuntu icon.
2. Copy and paste the commands one by one in the VM console while logged in as root. If there are any errors, check for typing mistakes. The second command has capital O, not a zero.
apt update && apt -y install ca-certificates wget net-tools gnupgwget -qO - https://as-repository.openvpn.net/as-repo-public.gpg | apt-key add -echo "deb http://as-repository.openvpn.net/as/debian focal main">/etc/apt/sources.list.d/openvpn-as-repo.listapt update && apt -y install openvpn-asWhen the update finishes, you see the confirmation message.
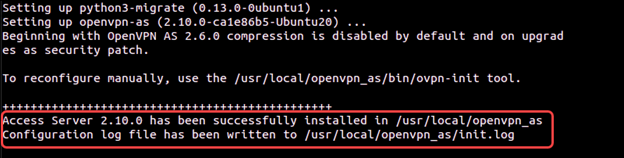
3. Save the OpenVPN Access Server password so you can use it later. The password can be changed via the OpenVPN Access Server UI.

Configure OpenVPN Access Server
To configure OpenVPN Access Server:
1. Go to the OpenVPN Access Server admin page using the public IP, for example:
https://131.xxx.xxx.106:943/admin2. Use the credentials you noted after the OpenVPN Access Server installation.
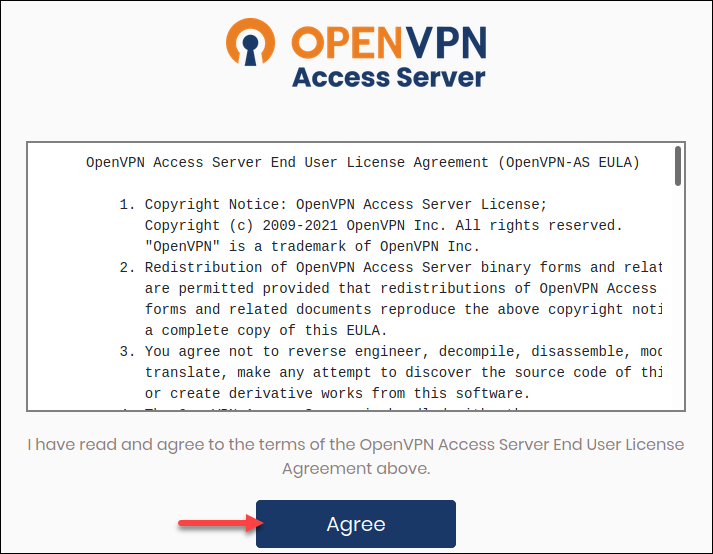
3. Click Agree if you agree to the terms and conditions.
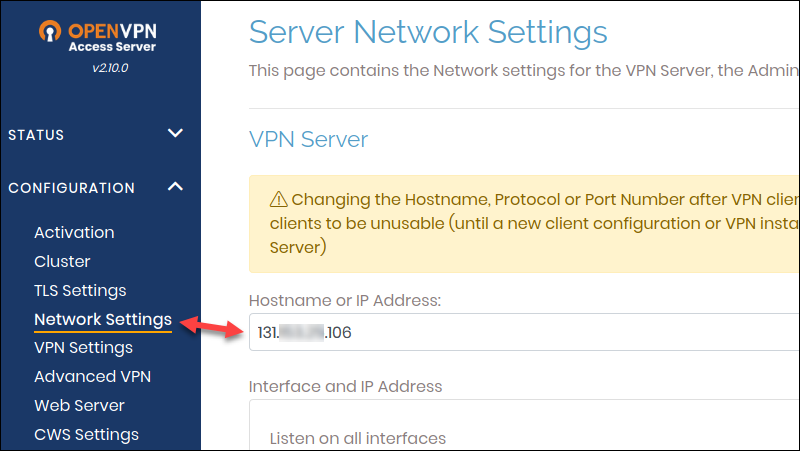
4. In Configuration -> Network Settings, change the hostname from the private IP address to the public IP.
5. Scroll down and click Save Settings and Update Running Server.

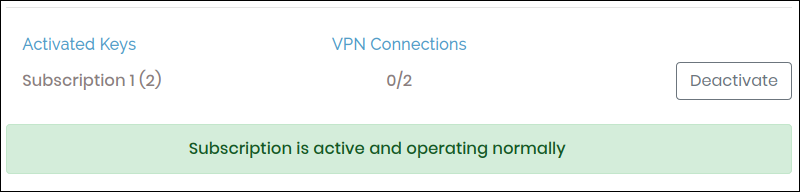
6. Navigate to Activation, enter the subscription key from the OpenVPN Access Server portal, and click Activate.
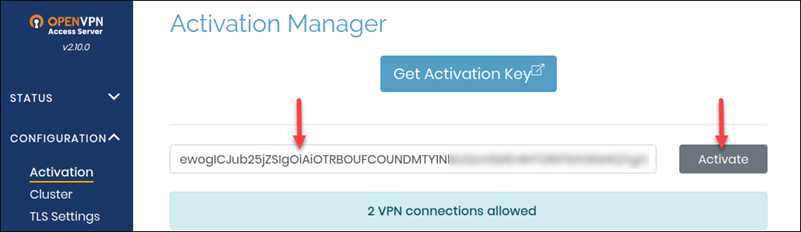
If successful, you receive the message "Subscription is active and operating normally."
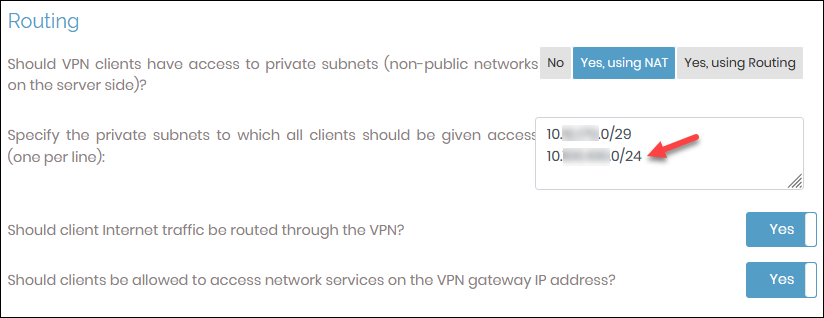
7. Navigate to Configuration - > VPN Settings, scroll to the Routing section and add the guest VM subnet you used previously.
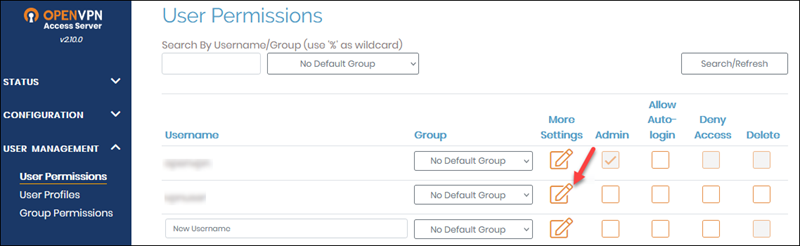
8. Go to User Management -> User Permissions and create a new user account for the client VPN access. Click the More Settings icon to add a password.
9. Click Save Settings and Update Running Server
On the client side, there are a few more steps:
1. Log in to https://your_public_ip/ with the user you just created.
2. Install the recommended client for the OS you are using. Depending on the OS you choose, you either get a file to download or are redirected to the page to follow the installation instructions.
In Windows, if you get a Defender alert, accept to continue the installation. The profile is included with the installation.
If you already have the OpenVPN Access Server application installed and you are adding another connection, download the profile and import it.

3. Finally, launch the OpenVPN Access Server client and establish a connection.
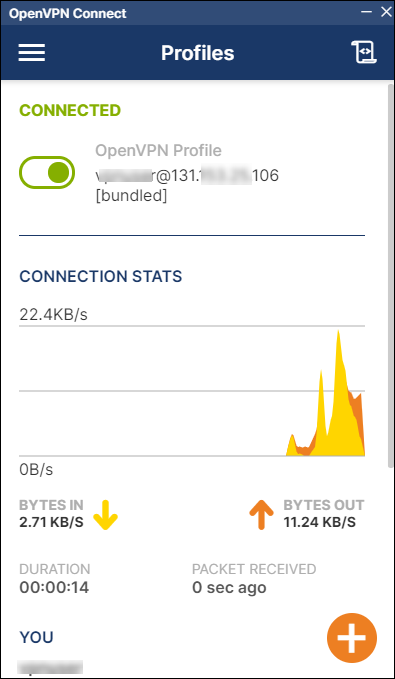
To test if the connection is working, RDP or SSH into your VM using the private IP.
Final Steps
Some firewall and DNAT rules are not necessary anymore. Log in to the Cloud Director and remove:
- TCP 943 firewall rule.
- TCP 943 DNAT rule.
To do so:
- Navigate to Networking -> Edges.
- Select an Edge Gateway and click Services.
- In the Firewall section, highlight the port 943 rule and click the X button to delete it.
- In the NAT tab, delete the DNAT TCP 943 rule. Highlight the row and click the X button.
Note: Once you remove the 943 firewall and NAT rules, the OpenVPN Access Server admin page will be accessible via https://your_public_ip/admin
Troubleshooting
If you can connect to your VMs with the SSL VPN Plus client and cannot when connected with the OpenVPN Connect application, please review the firewall rules you created and subnet added to the OpenVPN Admin page.
Additionally, try changing the following settings in the OpenVPN Access Server Admin page:
1. Go to the https://your_public_ip/admin page.
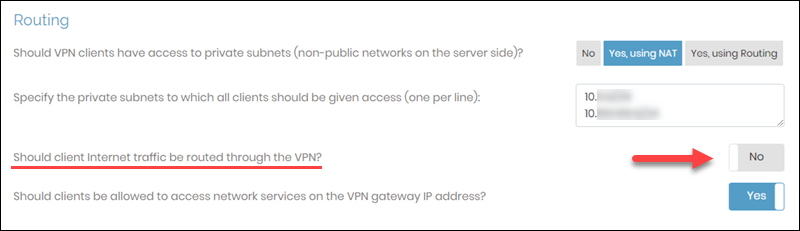
2. Navigate to Configuration -> VPN Settings.

3. In the Routing section, change “Should client Internet traffic be routed through the VPN?” to No.
Useful Links
For additional information on OpenVPN Access Server, consult the Open VPN documentation:
If you need to do subnet calculations, use the subnet calculator.
Note: Learn also how to install OpenVPN on Docker.
Conclusion
By following the instructions in this guide, you should have a working OpenVPN Access Server installation with proper configuration.
The setup process is straightforward and simple if you complete all the steps in the tutorial.
