Introduction
Terraform is an Infrastructure as Code (IaC) tool for provisioning data center infrastructure. The tool uses the declarative approach to configuration, allowing users to define and provision infrastructure securely and efficiently.
This tutorial will show you how to use Terraform to facilitate infrastructure provisioning. The article uses phoenixNAP's Bare Metal Cloud solution to illustrate the procedure.
Prerequisites
- Administrative access to your system.
- Terraform installed.
Provision Infrastructure with Terraform
When provisioning infrastructure using Terraform, users create declarative configuration files that define the infrastructure provider and the resources to provision. The files are written in HashiCorp Configuration Language or JSON.
The following sections will show you how to:
- Register your provider and credentials.
- Create and provision resources in Terraform.
- Remove resources provisioned with Terraform.
Install Infrastructure Provider
Terraform lets you provision infrastructure from a large number of supported providers. Visit Terraform's website to search the list of supported providers.
As an example, this tutorial uses pnap, a verified Terraform provider that allows you to provision phoenixNAP's Bare Metal Cloud servers. Follow the steps below to register pnap on your system.
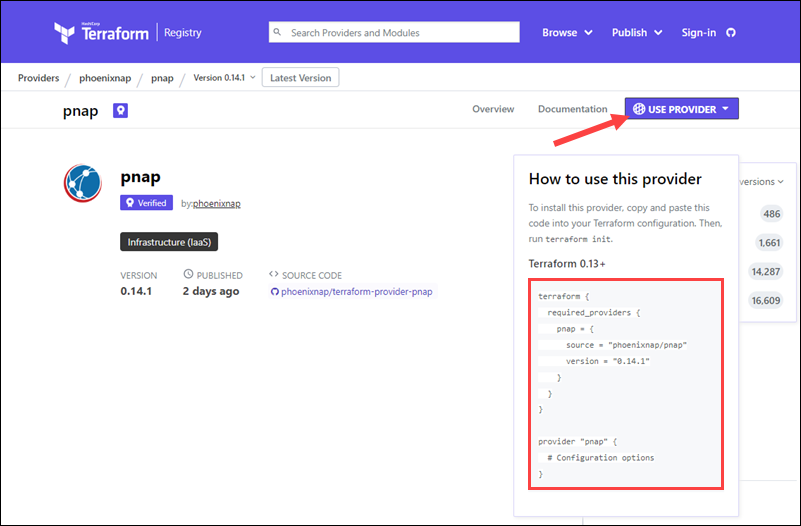
1. Browse to the provider's page in Terraform Registry.
2. Select the Use Provider button in the upper-right corner of the page.
3. Copy the code from the How to use this provider box.
4. On your system, create and go to the directory in which you will store your Terraform configuration:
mkdir bmc && cd bmc5. Use a text editor to create the main Terraform configuration file:
nano main.tf6. Paste the provider definition into the file.
terraform {
  required_providers {
    pnap = {
      source = "phoenixnap/pnap"
      version = "0.14.1"
    }
  }
}

provider "pnap" {
  # Configuration options
}
7. Save the file and exit.
Provide Credentials
To communicate with the Bare Metal Cloud, you need to connect your API credentials to the Terraform installation.
To do so:
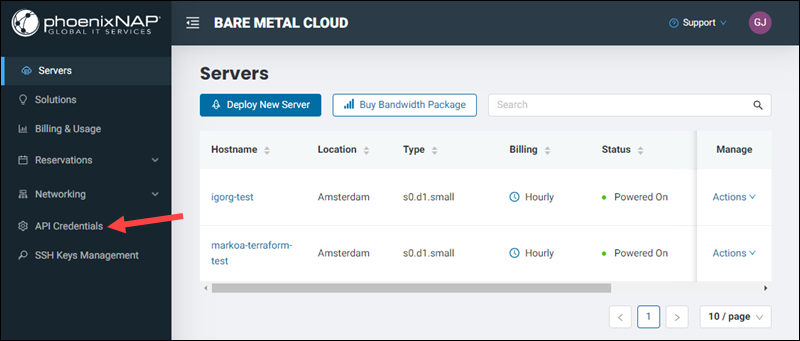
1. Log in to the Bare Metal Cloud portal.
Note: If you are not registered in the Bare Metal Cloud portal, learn how to create an account. For further assistance, watch the BMC account creation video instructions.
2. Select API Credentials in the menu on the left side.
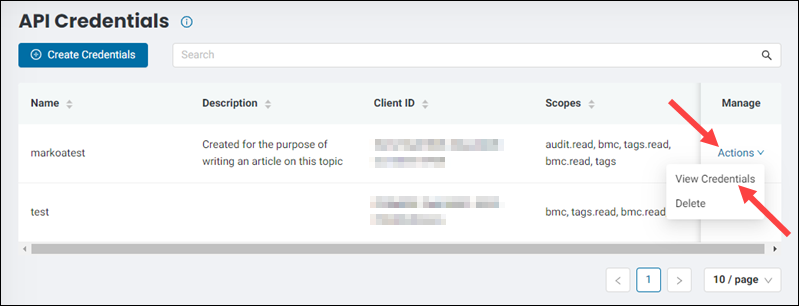
3. Select the Actions item for the credentials you wish to use and click View Credentials in the menu.
4. On your system, create and go to the .pnap directory. The directory needs to be in your home directory.
mkdir ~/.pnap && cd ~/.pnap5. Use a text editor to create the configuration YAML file:
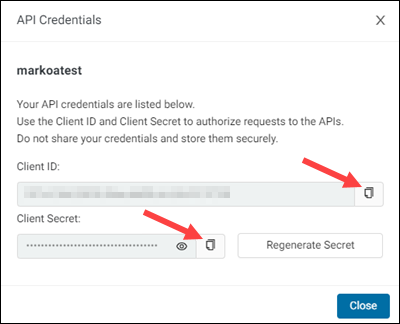
nano config.yaml6. Return to the BMC portal and copy your Client ID and Client Secret by clicking the copy buttons.
7. Paste the ID and the secret into the config.yaml using the following format:
clientID: [your-client-id]
clientSecret: [your-client-secret]
8. Save the file and exit.
Create Resources in Terraform
Resources in Terraform are defined in .tf files using the arguments supported by the specific provider.
1. Create a file for a new resource.
nano resource.tf2. Type the server configuration. To provision a server, the pnap provider requires the following arguments:
hostname- the hostname of the server.os- the operating system to be installed on the server. For example,ubuntu/bionic.type- the server type ID. For example,s1.c1.medium.location- the location of the server. For example, to provision a server located in Phoenix, typePHX.
Note: The full lists of supported operating systems, server types, and locations are available in the BMC Developer Portal.
Following is a configuration that uses the examples listed above.
resource "pnap_server" "Test-Server-1" {
    hostname = "Test-Server-1"
    os = "ubuntu/bionic"
    type = "s1.c1.medium"
    location = "PHX"
    install_default_ssh_keys = true
    ssh_keys = [
        "[your-SSH-key]"
    ]
}
3. Save the file and exit.
Note: For the list of all the available arguments, refer to the pnap provider documentation in the Terraform Registry.
Provision Resource in Terraform
Terraform utilizes the terraform command and subcommands to provision and manage resources. The steps below explain how to initialize the configuration, prepare for the provisioning, and provision new infrastructure.
1. Initialize the provider with the following command:
terraform init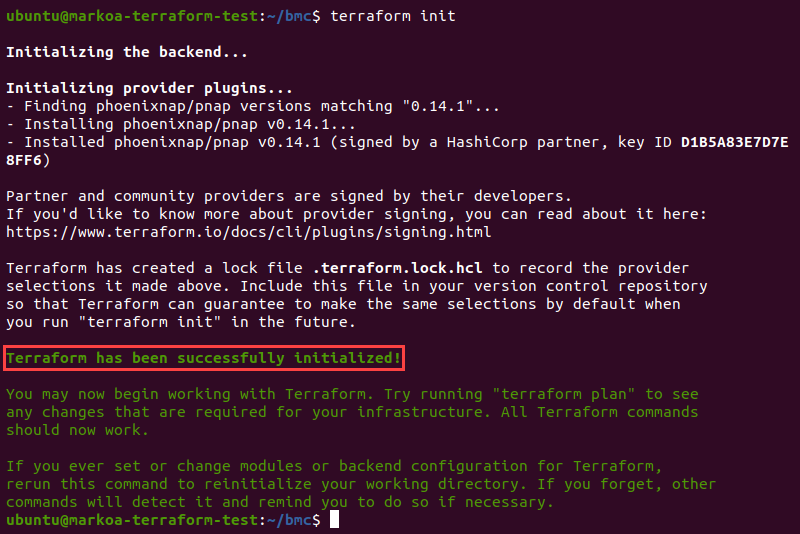
The output shows Terraform successfully initializing the pnap provider.
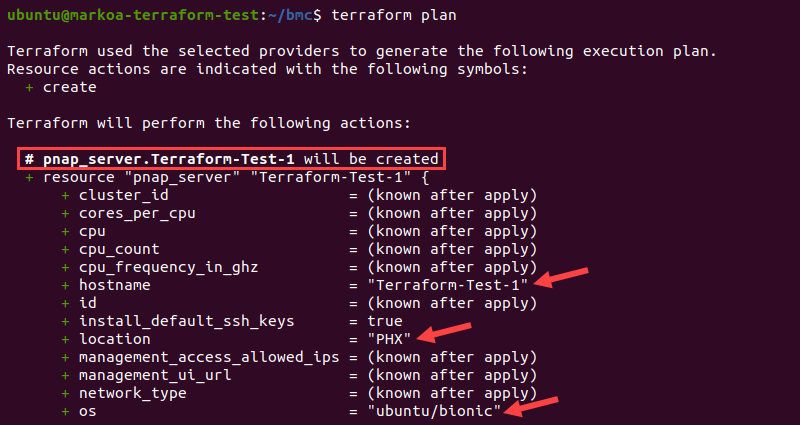
2. To check the execution plan before applying the changes, type:
terraform planTerraform generates an execution plan and outputs the actions that will be performed.
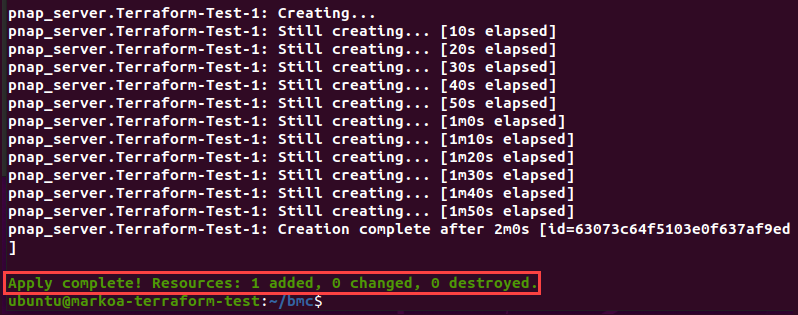
3. Apply the configuration by typing:
terraform applyThe output shows the plan and asks you to confirm it:

4. Confirm the plan by entering yes.
Terraform starts the process, and you can follow the progress in the output. When the configuration is applied, the confirmation message appears.
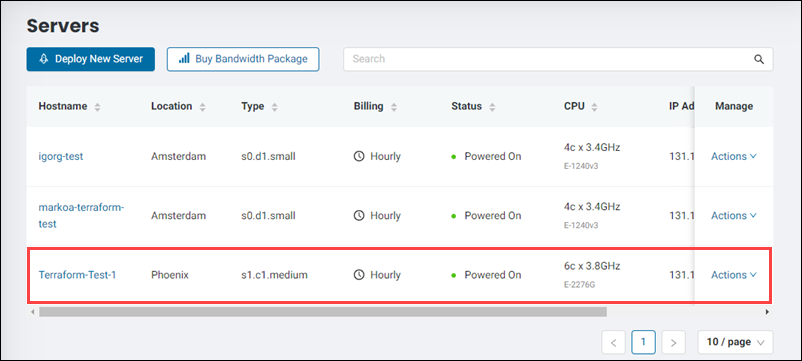
Return to the BMC portal and confirm that the new server is listed in the Servers section.
Remove Terraform Resources
To remove all the resources created by Terraform, use the following command:
terraform destroyTo remove a specific resource:
1. Open the file that contains the resource configuration.
nano resource.tf2. Comment out the resource by typing the # sign at the beginning of each related line.
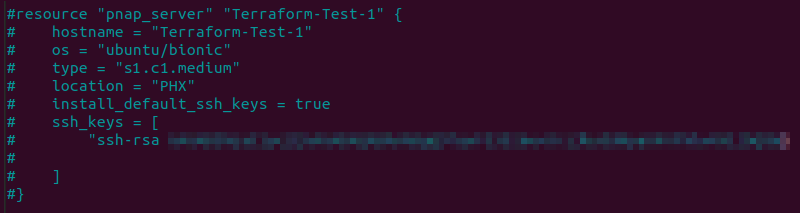
Save the file and exit.
3. Apply the new configuration:
terraform apply4. Terraform reports that one resource is scheduled to be destroyed. Confirm the action by entering Yes.

The output confirms the resource removal.

Conclusion
After following this tutorial, you should know how to provision a server using Terraform. The article covered the steps to register an infrastructure provider, define resources, and provision them using Terraform.
